
The Black Tower of Kalarel the Vile (Part II)
These are my notes from prep for my FLGS campaign. We take all comers, anyone that wants to play, taking as the big bad Kalarel the Vile as described by Matt Coleville on his Running the Game series. We've had a ton of fun playing with some of the more obvious tropes of Dungeons and Dragons, and now we're bringing it home.
[[This only goes up to the Hall of Whispers. That’s where my group ended, and on the off chance they pay any attention at all to this, I’m not going to spoil it.]]
I like AI as a tool. In the age of Chat GPT and Midjourney, I'm able to develop and share quickly and easily the preparation for these games, my notes and how I imagined the scene might look. Enjoy.
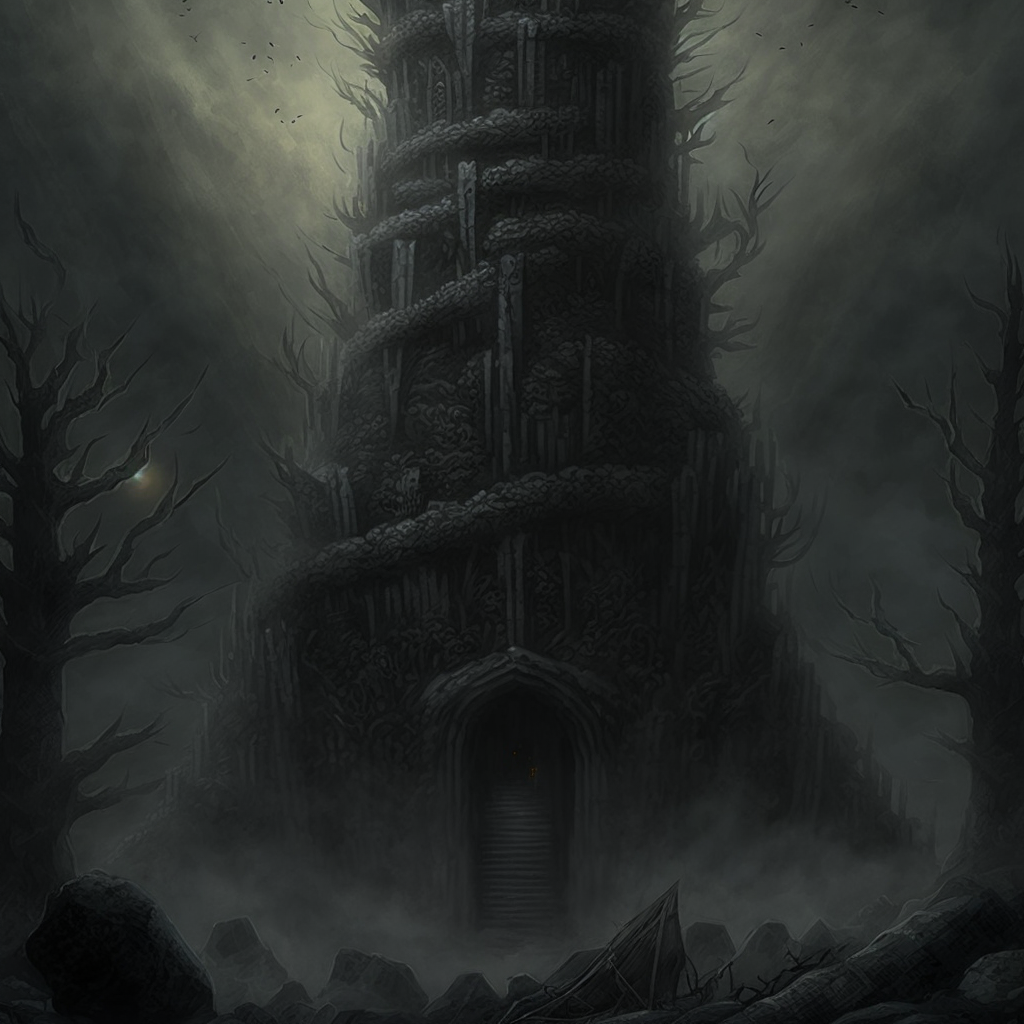
Deep in the dark forest, where the veil is thin, the Black Tower rises like a blight on the land —v4
Lower Levels of the Tower: First Floor
AI can’t do EVERYthing.
The first floor of the tower is a twisted labyrinth filled with traps, puzzles, and undead guardians. The objective is for the party to navigate through the maze-like structure and find the stairs leading to the middle level of the tower. A giant bone golem guards the stairs, serving as a powerful obstacle for the players.
This level was shared by Kazok and Nem-set, a necromancer (CR 4) and student of Kalarel who commands the undead and can animate more if not dealt with quickly. Kazok’s followers, the diseased ratmen, mourn the loss of their leader, and thirst for revenge against the PCs.
Grasping Walls:
Throughout the entire level, the walls comprised of corpses and skeletons are a constant hazard. When a PC ends their turn adjacent to a wall, they must succeed on a DC 14 Dexterity saving throw or be grabbed by the grasping undead embedded within the wall. Characters who fail this save become restrained and suffer 1d4 necrotic damage at the beginning of each of their turns, as the undead drains their life force. To break free from the undead's grasp, the restrained character can make a DC 14 Strength (Athletics) or Dexterity (Acrobatics) check as an action on their turn.
Wandering Monsters:
Roll a 1d12 when players are in hallways or empty rooms. On an 11, consult the Easy Encounter table; on a 12, consult the Medium Encounter table.
Easy Encounter Table (1d6):
1) 2 Ghouls
2) 1 Shadow
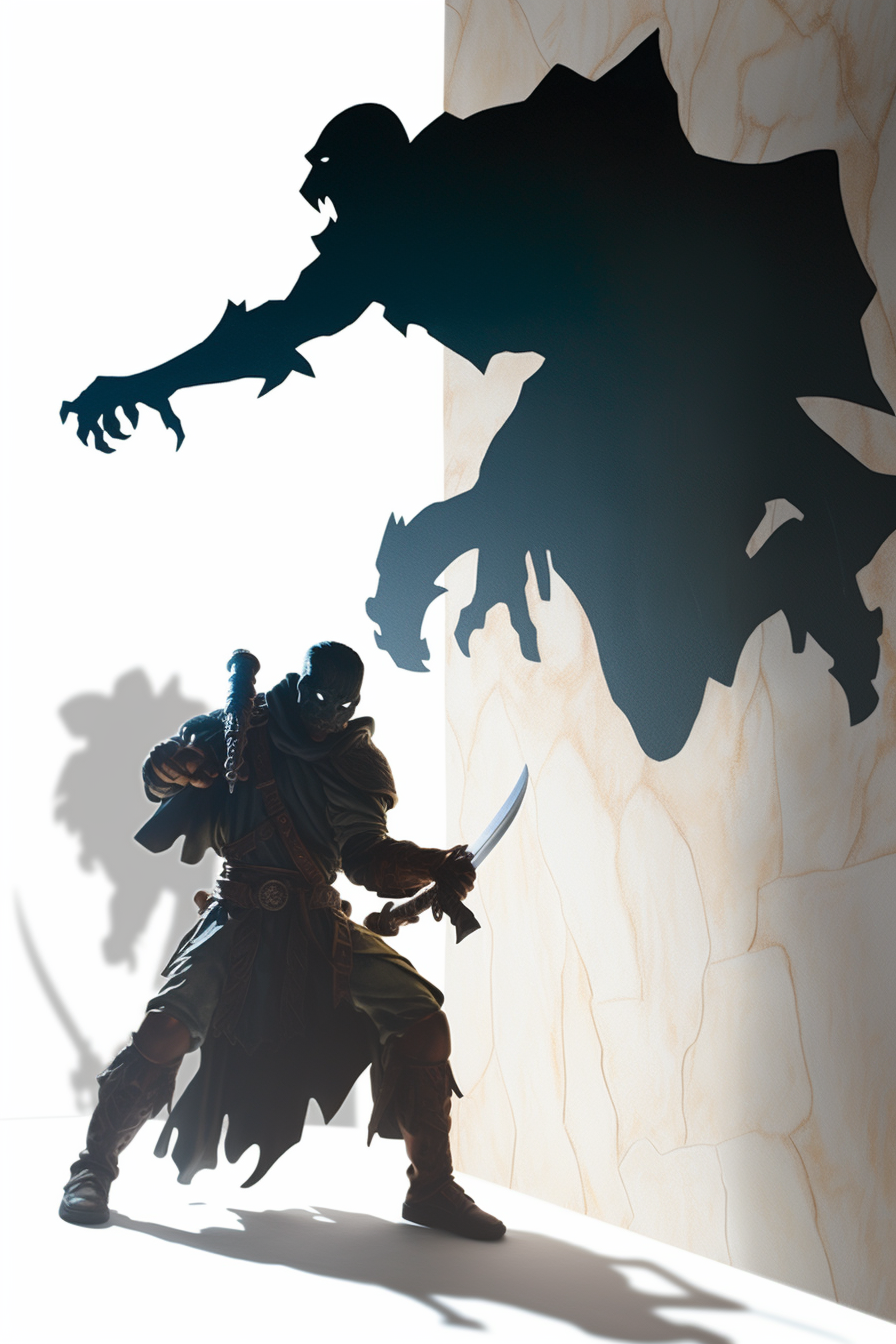
The Shadow detaches itself from the wall and attacks the adventurer, dungeons and dragons, white background —ar 3:2
3) 4 Minion Skeletons, accompanied by 1 Skeleton Archer (use regular Skeleton stat block, but with a longbow, ranged weapon attack: +4 to hit, range 150/600 ft., one target, hit: 5 (1d8+1) piercing damage)
4) 3 Minion Shadows, accompanied by 1 Shadow that has half its normal hit points (use regular Shadow stat block, but reduce the hit points to 8)
5) 4 Minion Ghouls, accompanied by 1 Ghoul with a reduced bite attack (use regular Ghoul stat block, but reduce the damage of the bite attack to 4 (1d4+2) piercing damage)
6) 2 Diseased Ratmen
Medium Encounter Table (1d6):
1) 1 Ghast
2) 4 Minion Ghouls, accompanied by 1 Ghoul with a reduced bite attack (use regular Ghoul stat block, but reduce the damage of the bite attack to 4 (1d4+2) piercing damage)
3) 4 Minion Ghouls, accompanied by 1 Ghoul with a reduced bite attack (use regular Ghoul stat block, but reduce the damage of the bite attack to 4 (1d4+2) piercing damage)
4) 3 Shadows
5) 4 Minion Ghouls, accompanied by 1 Ghoul with a reduced bite attack (use regular Ghoul stat block, but reduce the damage of the bite attack to 4 (1d4+2) piercing damage)
6) Nem-set
Room by Room
1) The Antechamber:
This antechamber, once a place of respite and refuge, now reeks of death and decay. The walls, already lined with corpses and skeletons, are now barely visible beneath a gruesome mound of bodies piled high in the center of the room. The grim aftermath of a triggered Corpse Fall Trap lies before you, a horrifying sight that chills you to the bone. The floor is slick with blood and gore, and a cacophony of flies buzzes around the room, feasting on the rotting flesh. Amidst the carnage, you catch a glint of metal, hinting at the possibility of valuable items among the dead.

The walls of Kalarel’s tower are as dangerous as any encounter. Don’t end your move next to a wall… if you can help it.
In this macabre antechamber, the PCs may feel compelled to search the pile of bodies for any useful items or clues. If they choose to do so, they will discover a suit of chain mail armor, surprisingly well-preserved considering its gruesome surroundings. The armor is coated in a thin layer of gore, but a thorough cleaning should restore its functionality.
Additionally, on a successful DC15 Investigation skill check, the PCs will find a satchel with three broken potion bottles, but with two intact healing potions, still sealed and untouched by the pervasive decay. These valuable items were once the property of ill-fated adventurers who met their end in this accursed place. The air in the room is heavy and oppressive, urging the characters to leave as quickly as possible.
Amidst the grisly tableau, the PCs will notice a single exit on the far side of the chamber. The door, partially blocked by the mass of corpses, appears to be the only means of escape from this nightmarish scene. Consider describing the door in more detail to build anticipation for what may lie beyond it, and to further immerse the players in the grim atmosphere of this unforgettable location.
Roll a 1d12 and consult the Wandering Monster tables
On an 11, consult the Easy Encounter tables
On a 12, consult the Medium Encounter table.
2) Lever Puzzle Room - Syllogism Puzzle:
As you cautiously step into this wide hallway, the air is thick with a sense of dread and unease. , a wall is adorned with four levers, each bearing a unique symbol: a skull, a flame, a crescent moon, and a sword. Opposite these levers, the walls are covered in grotesque frescoes depicting scenes of undeath and resurrection, with skeletal remains of past victims embedded into the artwork, their tormented expressions forever frozen in time.
An inscription, carved into a stone set into the wall in a poetic form, catches your attention. It seems to hold the key to deciphering the purpose of the levers and unlocking the secret passage that lies hidden within these walls. As you study the riddle and the symbols, you can't shake the feeling that you're being watched, as if the very walls themselves are aware of your presence and eager for your failure.
Upon entering the room, the party notices four levers, each adorned with a unique symbol: a skull, a flame, a crescent moon, and a sword. The walls are covered with grotesque frescoes depicting scenes of undeath and resurrection, with the skeletal remains of past victims embedded into the artwork. On the wall opposite the levers is an inscription carved into the stone. The inscription is an ancient riddle, written in a poetic form, that will help the party deduce the correct order in which to pull the levers.
The riddle reads:
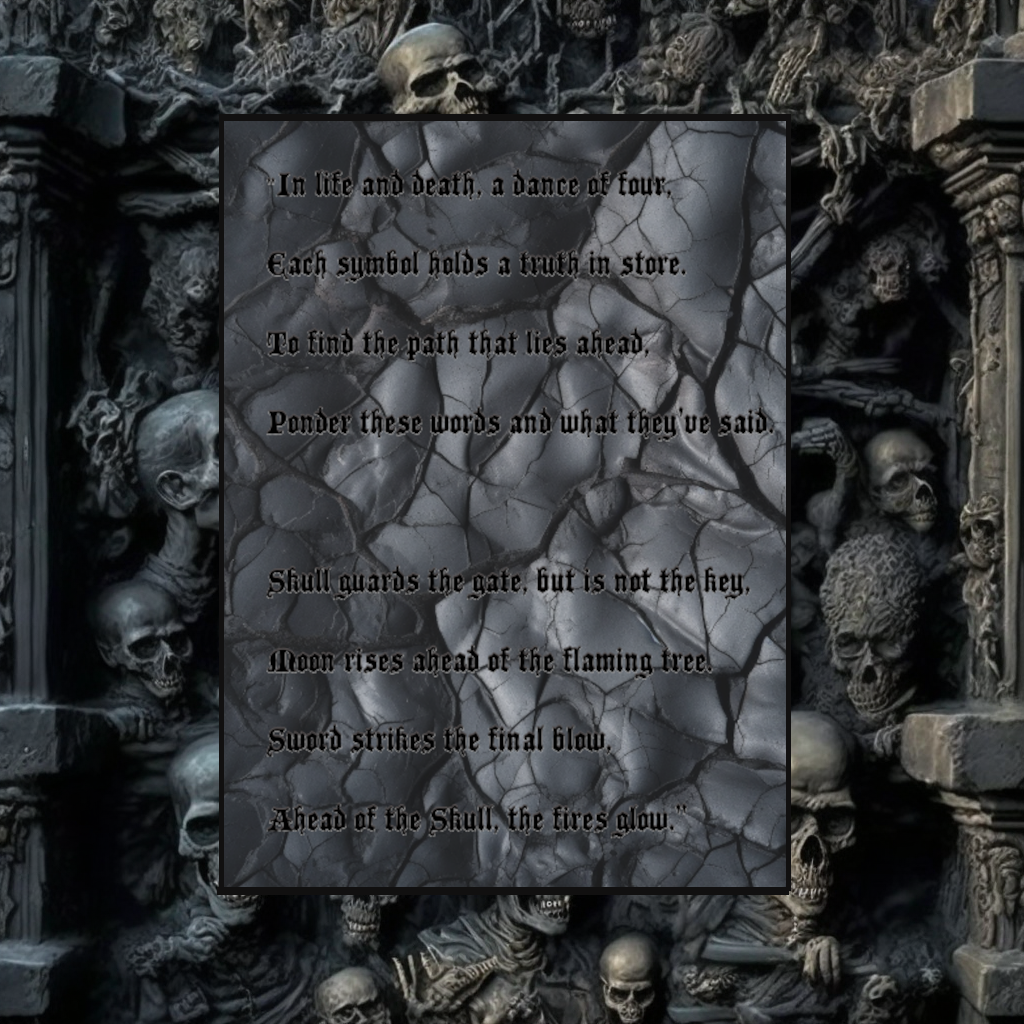
Syllogism:
The skull is not the first lever (Skull guards the gate, but is not the key).
The flame comes before the skull (Ahead of the Skull, the fires glow).
The moon comes before the flame (Moon rises ahead of the flaming tree).
The sword is the last lever (Sword strikes the final blow).
Solution:
Based on the syllogism, the correct order to pull the levers is:
Crescent Moon, Flame, Skull, Sword.
Upon pulling the levers in the correct order, the party hears the sound of grinding stone as a secret door slides open, revealing a hidden passage that leads deeper into the tower. If the levers are pulled in the wrong order, a trap is triggered, releasing a swarm of spectral ravens into the room, harassing the characters and attempting to peck at them with their ghostly beaks. Each character in the room must make a DC 15 Dexterity saving throw to dodge the ravens' swooping attacks.
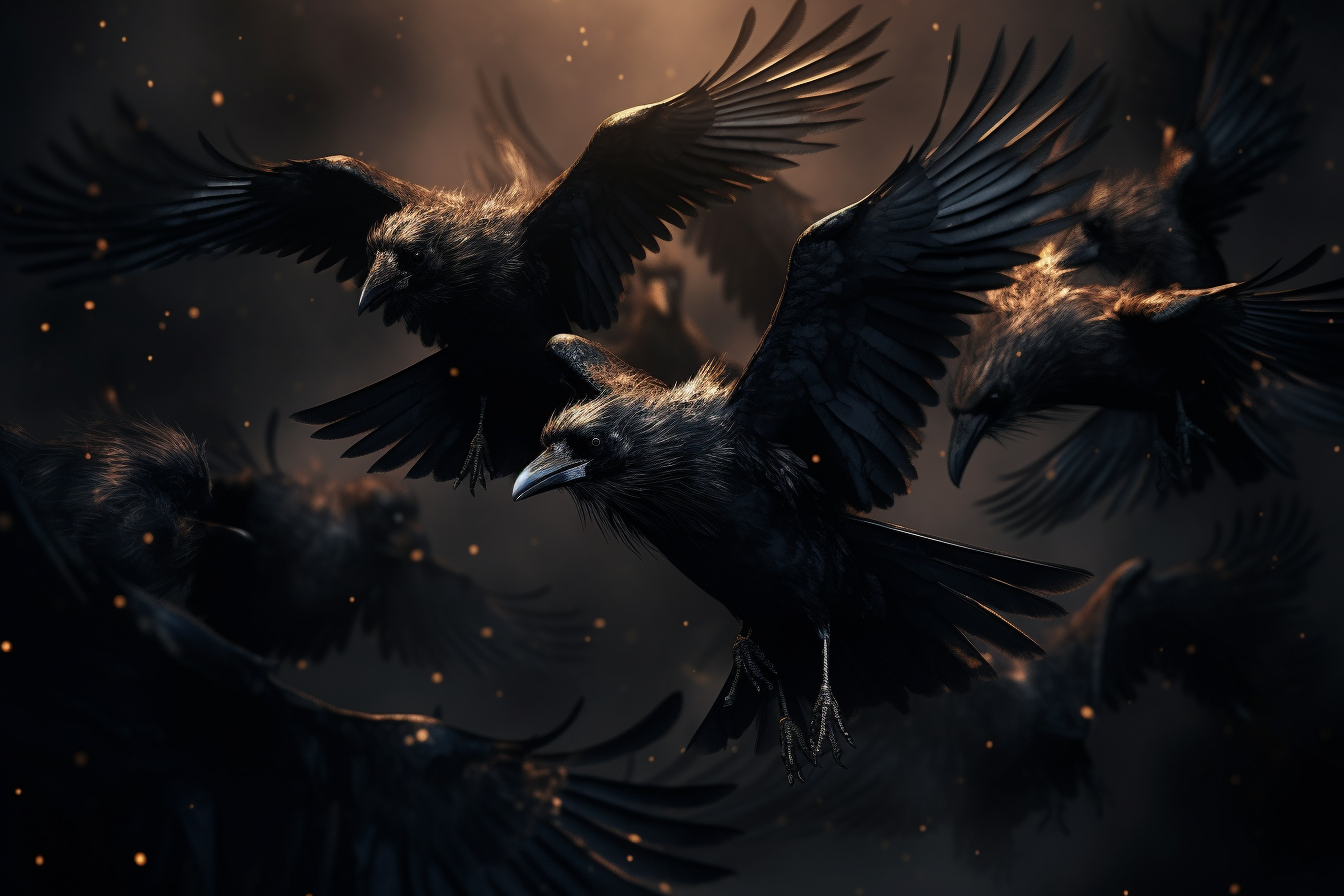
a flying swarm of spectral ravens, dark background, fantasy --ar 3:2
Failure: On a failed save, the character takes 2d6 necrotic damage and is blinded until the end of their next turn as the ravens obscure their vision. On a successful save, the character takes half damage and avoids the blinding effect.
The ravens continue to harass the characters each round until the correct lever order is found or the party flees the room. If the characters take the time to carefully observe the ravens' movements and the riddle's clues, they can attempt an Intelligence (Investigation) check with a DC 15 to gain advantage on their next Dexterity saving throw against the spectral ravens.
3) Chamber of Mirrors:
As you enter the chamber, a disconcerting sight greets you. The room is filled with warped and twisted mirrors, each reflecting distorted images of the party. You see yourselves as horrifically disfigured or decomposing versions, a ghastly parody of your true selves. The walls, composed of the entwined remains of countless victims, appear to shift and move as if alive, making it difficult to discern reality from the twisted reflections.
A palpable sense of unease permeates the air. Shadows cast by the flickering light of your torches seem to take on a life of their own. As you cautiously navigate the maze of mirrors, the unsettling feeling of being watched intensifies.
This room, while unsettling, is not trapped or otherwise dangerous to the party. Nem-set is using the mirrors to watch them, but will likely not attack them yet, counting on the tower’s defenses to do the hard work.
Roll a 1d12 and consult the Wandering Monster tables
On an 11, consult the Easy Encounter tables
On a 12, consult the Medium Encounter table
4) Entrance Hall:
As you step into the entrance hall, the air is thick with the scent of decay and despair. Before you, the remnants of a once-grand staircase stand, now collapsed and twisted beyond recognition, with shattered steps and bent metal strewn about. The walls are lined with desiccated corpses and skeletal remains, an unsettling testament to Kalarel's dark influence.
A faint, eerie glow seeps through the gaps between the bones, casting twisted shadows that dance along the floor and walls. You can almost hear the whispers of the souls trapped within the walls, their final resting place corrupted by the twisted necromantic rituals that have taken place here. Several doors beckon, leading to different parts of the maze-like structure, each one promising to reveal more of the tower's dark secrets.
The weight of the tower's tragic past and its transformation into a bastion of darkness presses down on you, urging you to tread carefully as you delve deeper into its macabre depths.
This Entrance Hall was once the primary point of entry to the tower, back when it was used as a bastion against incursions from the Shadow Plane. Kalarel has mortared the doors closed, turning them into just another wall of corpses. There is nothing of value here, and the stairs are impassable.
Roll a 1d12 and consult the Wandering Monster tables
On an 11, consult the Easy Encounter table.
On a 12, consult the Medium Encounter table.
5) Armory:
As you enter this room, you're greeted by the sight of rusty weapons and dented armor scattered across the floor, their metallic forms twisted and warped beyond recognition. The walls, formed of contorted skeletons, seem to reach out with bony fingers, as if attempting to grasp those who venture too close. The air is heavy with the stench of decay and the metallic tang of rusted metal.

Ghast
The remnants of once-fine armaments lie strewn about, a testament to the fierce battles that must have been fought within these walls. You can almost hear the echoes of clashing steel and the cries of fallen warriors, their spirits still clinging to this desolate place.
Hidden among the rusted wreckage, a ghast lies in wait, ready to ambush the unsuspecting party. The ghast takes advantage of the darkness and the scattered debris, using its stealth to remain unseen.
To notice the ghast, players must succeed on a DC 16 Perception check. If they fail, the ghast gets a surprise round against the party.
If the players are particularly cautious or suspicious, you may choose to grant them advantage on their Perception checks or give them additional hints through the room's description, such as the faint sound of breathing or a subtle shift in the shadows.
Treasure:
Amidst the rusty weapons and dented armor, the players can find a set of well-preserved plate armor with silver inlays. This armor functions as +1 plate armor and grants the wearer advantage on saving throws against the effects of necromancy spells.
A quiver containing ten silver-tipped arrows lies buried under a pile of broken weaponry. These arrows deal an additional 1d4 radiant damage against undead creatures.
6) Barracks:

Ghouls are monstrous creatures of the undead, vague forms that toe the line between man and beast, creatures of the night feast upon the dead, dungeons and dragons, white background --ar 2:3
As you enter the room, the putrid smell of decay assaults your senses. Before you lie the remains of an old barracks, with rotten bunk beds and moldy equipment strewn about. The walls, a morbid tapestry of decaying corpses and skeletons, seem to close in around you. In the shadows, you spot a ghoul crouching over the corpse of an unfortunate captive, tearing at the flesh with its sharp teeth and clawed hands.
The ghoul, having been disturbed from its grisly meal, turns its attention toward the party, eager to add them to its feast. Depending on the party's approach, you may choose to have the ghoul immediately attack or attempt to hide and ambush the players.
Treasure:
Hidden beneath a pile of moldy equipment, the players can find a small wooden chest containing 100 gold pieces and three onyx gems worth 50 gold pieces each.
A finely crafted shortsword with a silver handle, engraved with the sigil of the tower's original defenders, can be discovered underneath a rotting bedroll. This weapon functions as a +1 shortsword and deals an additional 1d6 radiant damage against undead creatures.
7) Scale Room Puzzle:
As you step into the dimly lit room, the oppressive scent of decay fills the air. Dominating the center of the room is a large set of scales, forged from blackened bone and adorned with skulls and archaic symbols of disease and famine that you have come to associate with Malych.
Looking around the room, you see a small shrine, upon which is a vase containing withered roses. In a corner lies a pile of shattered bones. Above a near table, a small collection of vials filled with congealed blood sits on a dusty shelf, and on the table are scattered tarnished silver coins, each bearing the symbol of a skeletal hand.
Objective: To balance the scales using the objects found in the room, placing them into the appropriate side of the scale. The party must figure out the correct placement of the objects based on the riddle inscribed on the wall.

a massive set of scales, forged from blackened bone and adorned with skulls and archaic symbols of disease and famine, dark background --ar 3:2
Riddle:
"Four symbols of mortality, each with its place,
One side bears life, the other, death's embrace.
Fragile beauty fades to dust,
Marrow bears up the Wicked and the Just.
From within spills life's ebbing tide;
And from the ground, a spectral guide."
Solution: The riddle hints at the nature of the objects and their appropriate placements. The "fragile beauty" that fades to dust is the withered rose, while the "marrow" refers to the shard of bone. "Life's ebbing tide" refers to the vial of congealed blood, while the "spectral guide" from the ground refers to the tarnished silver coin. The correct placement is the withered rose and shard of bone on one side, and the vial of congealed blood and silver coin on the other.
Success: If the party places the objects correctly, the scales balance, and a hidden door in the room opens, revealing the path forward.
Failure: If the party places the objects incorrectly, a trap is triggered, releasing a swarm of ravenous maggots into the room. The party must make Dexterity saving throws (DC 15) or be covered in the maggots, suffering 1d6+1 necrotic damage and being slowed until they remove the maggots. The party can attempt the puzzle again, but each failure results in the same consequences.
8) Dining Hall:
As you enter the room, a vile stench assaults your senses. Before you stands a grand dining hall, its long table laden with rotting food and adorned with the skeletal remains of former guests. The walls appear to be a grotesque combination of decaying flesh and exposed bone, as if the room itself is feasting on the remains. You hear ominous sounds echoing through the chamber, and a sense of terror begins to settle in.
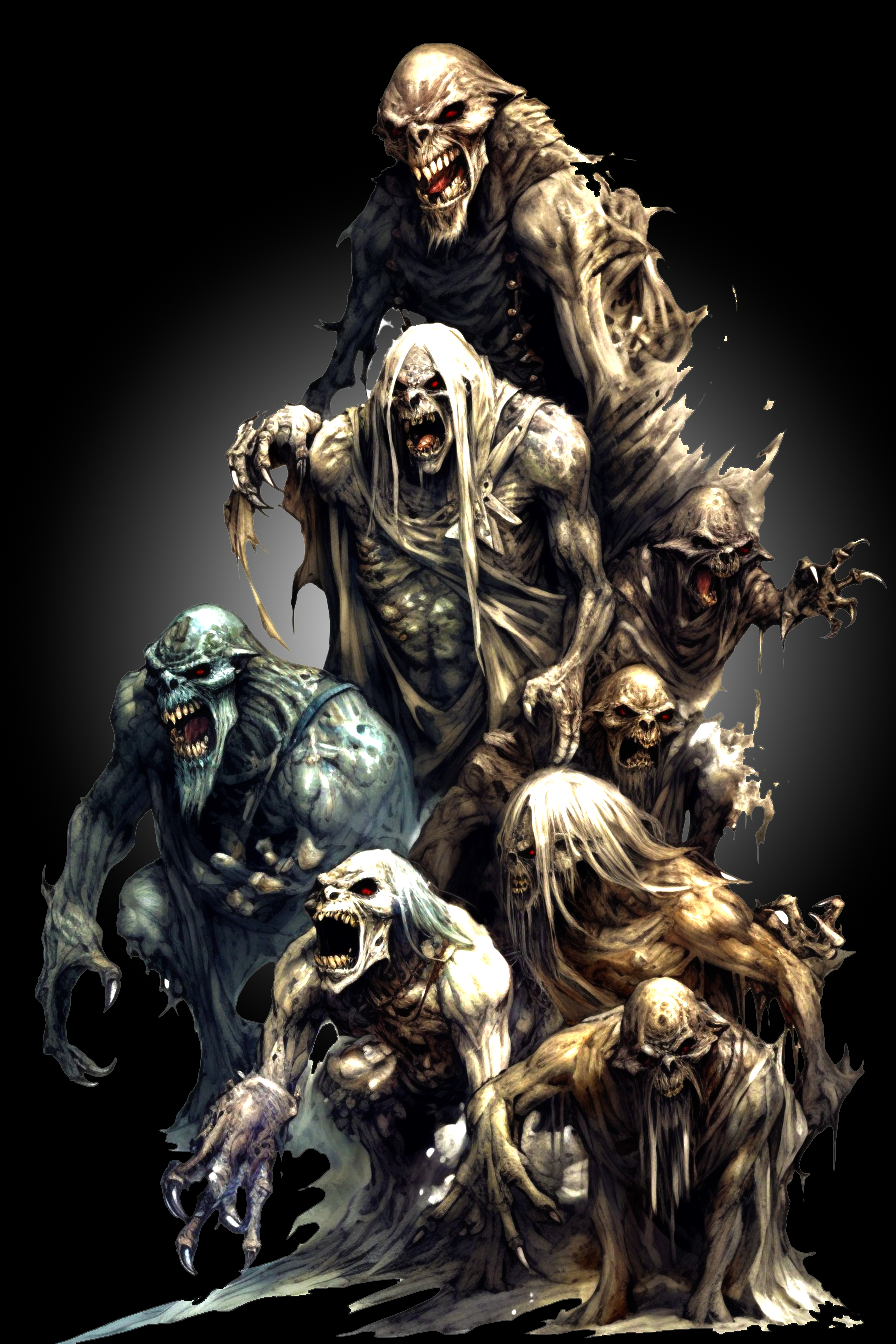
Careful, adventurers, ghouls and ghasts often travel in packs…
Two ghouls and two ghasts prowl the room, waiting for an opportunity to attack the party. They use the dark corners and piles of rotting food to hide and take advantage of their prey. They will attempt to ambush the party if given the chance, or will engage in direct combat if discovered.
Treasure:
Hidden among the remains of the unfortunate guests and the rotting food, the party can find the following items:
A silver serving platter, tarnished but still valuable, worth 100 gp.
A set of six gold-inlaid goblets, worth 25 gp each.
A delicately carved ivory figurine of a raven, worth 50 gp.
A scroll case containing a Scroll of Protection from Undead.
A pouch containing 35 gold pieces and 50 silver pieces.
The party will need to spend some time searching the room to discover these items. A successful DC 15 Investigation check will reveal the hidden treasures.
9) Gallery:

diseased rat-men, swathed in cloaks, skittering through the dark halls of the black tower --ar 3:2
As you step into the long, narrow room, you are greeted by an unsettling sight. The walls are covered in portraits of long-dead nobles and warriors, their faces twisted in agony as the skeletal and corpse-laden walls seem to consume them. An eerie feeling washes over you as the eyes of the tormented souls in the portraits appear to follow your every movement through the room.
This hallway is not trapped, or otherwise dangerous. Diseased Rat-men are spying on the party, using the paintings as cover
Roll a 1d12 and consult the Wandering Monster tables
On an 11, consult the Easy Encounter table.
On a 12, consult the Medium Encounter table.
10) Dark Grove:
As you enter this room, you find yourself in a twisted, unnatural forest grove. A massive, gnarled tree dominates the center, its twisted limbs reaching out like skeletal fingers. The air is heavy with the stench of rot, and shadows dance menacingly across the ground. The walls, formed of twisted, writhing corpses and skeletons, seem to pulse with a grotesque, unnatural life, though the ceiling is barred, rather than mortared, a sliver of blue moonlight demonstrating that the eclipse is not yet at its zenith. In the eerie gloom, you see 4 Diseased Ratmen engaged in some dark rite. No visible exit can be seen, adding to the room's sense of hopelessness and despair.

a twisted, unnatural forest grove. A massive, gnarled tree dominates the center, its twisted limbs reaching out like skeletal fingers. The air is heavy with the stench of rot, and shadows dance menacingly across the ground. --ar 3:2
The Diseased Ratmen are conducting rites for Kazok, the dark druid and their fallen leader, and will defend their sacred space if the party intrudes. If the PCs have a blessed acorn from the Cuore Natura, planting it in the room will negate the power of the twisted tree and make the portal at the end of the adventure vulnerable. However, this effect is not obvious to the characters, and they will need to deduce its significance themselves.
To progress to the next room, the party must locate a hidden underwater tunnel, which can be found with a successful DC 15 Wisdom (Perception) or Intelligence (Investigation) check. The tunnel is partially obscured by tangled roots and is filled with water, requiring the characters to swim through a short distance to reach the next chamber. If the party is struggling to find the tunnel, consider providing additional hints or allowing a successful Nature or Survival check to reveal the presence of a waterway beneath the tangled roots.
11) Painting Room Puzzle:
Emerging from the tunnel, you find yourselves in a dimly lit room filled with eerie paintings on the walls. In the center of the room, there's a large, ornate painting of a regal-looking figure in the attire of an ancient Danarian Patrician. As you approach, the figure in the painting suddenly comes to life, its eyes meeting yours with an unnerving gaze. The room seems to hum with a magical aura, and you notice a doorway sealed by an intricate, glowing magical barrier.
The regal-looking figure introduces itself as Vasarunes the Elder, a long-dead nobleman of Danar who was obsessed with the mysteries of life and death. In his afterlife, he's been cursed to guard this room and challenge those who seek passage with a riddle.
Riddle: Vasarunes the Elder poses the following riddle:

a spectral painting of a Roman patrician, cursed to live in an oil painting, guarding a magically sealed door --ar 9:16
"An unseen weight upon the chest,
A heart once strong, now fails the test.
A well of tears, an aching soul,
This feeling leaves one far from whole.
When loss is near, or love departs,
This visitor, the spirit smarts.
Tell me now, what silent curse,
Brings us low and makes life worse?"
The answer to this riddle is "grief."
If the party successfully answers the riddle, the magical barrier dissipates, allowing them to proceed. If the party fails to answer the riddle correctly, Vasarunes expresses disappointment, and the barrier remains intact. The party may attempt the riddle again, but each failure results in a shadowy wraith emerging from one of the paintings to attack the party.
Treasure:
Behind the painting of Vasarunes the Elder, there is a small, hidden compartment containing treasure. If the party examines the painting carefully, they can find the compartment with a successful DC 15 Intelligence (Investigation) check. The compartment contains a small velvet pouch with 10 valuable gemstones (each worth 50 gold pieces), a potion of greater healing, and a beautifully crafted silver ring adorned with a small, intricately carved skull (worth 200 gold pieces).
12) Torture Chamber:
As you enter the room, you are immediately confronted with a gruesome sight: rusted chains, shackles, and torture devices line the walls, which are constructed of the contorted bodies of former victims. The air is thick with the stench of suffering and the ghostly echoes of past victims' screams can still be heard, resonating through the chamber. Shadows dance across the floor, and you can't shake the feeling that something sinister lies hidden within this chamber of horrors.

a black stone wall made from zombies and bodies —v4
Trap, Spiked Wall: When a character steps on a certain floor tile, a hidden panel in the wall slides open, releasing a wall of spikes that swings out toward the unsuspecting victim. The character must make a Dexterity saving throw (DC 15) to avoid the spikes, taking 2d8 piercing damage on a failed save or half as much on a successful one.
· Detection: A character must succeed on a DC 15 Wisdom (Perception) check to notice the pressure plate and hidden spike wall in the room.
· Disarm: To disarm the trap, a character must succeed on a DC 15 Dexterity (Thieves' Tools) check to carefully disable the pressure plate without triggering the spike wall.
13) Storage Room:
Upon entering the storage room, you see shelves filled with old jars, bottles, and containers lining the walls, formed from the rotting remains of cadavers. A musty odor permeates the air, hinting at the passage of time and decay. Some of the containers still hold ancient, preserved organs, while others are broken and leaking their contents onto the floor. The room feels ominous, as if the very walls are watching you, waiting for an opportunity to strike.
Trap, Paralyzing Gas Cloud: As a character unknowingly steps on or disturbs the tripwire, they trigger a hidden mechanism that releases a noxious, paralyzing gas from concealed vents behind the containers on the shelves. Characters in the room must make a Constitution saving throw (DC 18) or become poisoned and paralyzed. The character can repeat the saving throw at the end of each of their turns, ending the effect on themselves with a success. The gas dissipates after 10 minutes or if the room is ventilated.
· Detection: A character must succeed on a DC 12 Wisdom (Perception) check to notice the tripwire and hidden vents in the room.
· Disarm: To disarm the trap, a character must succeed on a DC 20 Dexterity (Thieves' Tools) check to carefully disable the mechanism without releasing the gas.
14) Hall of Whispers:
As you enter this unsettling hallway, you're confronted by the unnerving sight of walls composed of agonized faces, their mouths frozen in eternal screams. The air is thick with a sense of dread and unease. As you venture deeper into the hall, ghostly whispers seem to emerge from the tormented faces, growing louder and more insistent, attempting to prey on your fears and insecurities.

an adventurer, hands to her head, losing her mind, screaming in terror, dungeons and dragons, dark psychadelic background --ar 2:3
Each character must make a Wisdom saving throw (DC 16) to resist the maddening whispers. On a failed save, the character is afflicted with short-term madness as the whispers worm their way into their mind, sowing seeds of fear and paranoia. Roll a d6 and consult the madness table below:
1. Uncontrollable laughter: The character is seized by fits of laughter and is unable to take any actions or concentrate on spells for the duration of the madness.
2. Paranoia: The character becomes convinced that their allies are plotting against them, and they are unable to trust them. They may refuse assistance or healing from their allies during the madness.
3. Hallucinations: The character starts to see and hear things that aren't there, causing them to be easily distracted and have disadvantage on ability checks and attack rolls.
4. Uncontrollable fear: The character becomes frightened of a specific object or creature in the room, even if it poses no real threat. They must take the Dash action and move away from the source of their fear on their turn.
5. Uncontrollable rage: The character flies into a blind rage, attacking the nearest creature (whether it's an ally or an enemy) on their turn for the duration of the madness.
6. Sudden amnesia: The character temporarily forgets their abilities, spells, and class features, rendering them unable to use them for the duration of the madness.
The madness lasts for 1d10 minutes or until the character is removed from the hall. On a successful save, the character is able to steel their resolve and push through the cacophony of whispers, unscathed.
Each minute spent in this area:
Roll a 1d12 and consult the Wandering Monster tables
On an 11, consult the Easy Encounter table.
On a 12, consult the Medium Encounter table.